Oh Ballast!
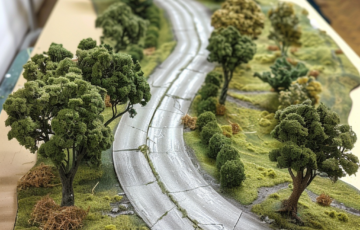
On a real railway, ballast acts as a bed for the railway tracks. Providing drainage for rainfall or flooding and adding extra weight and strength to the railway. I hear you asking, so why do I need ballast on my model railway? Adding ballast will add a significant amount of realism to any section of track it is laid on!
Ballasting model rail track is the first step in adding realism to your railway once the track has been laid. However, it can become very time consuming and fiddly, and you really want to ensure you get it right first time as to not make a mess of the track and baseboard. Our ballasting tips will take you step by step through each stage.

Track Ballasting Step 1
The first step to take is to paint the baseboard around the track a similar colour to the ballast you plan to use. Standard acrylic paints work well for this. This layer of paint will help the ballast to mix in well with the board underneath on any spots that have a light coating.
What tools do I need for track ballasting?
- Small paint brush
- Ballast suitable for your scale
- Eye dropper/syringe
- PVA + Washing up liquid (or simpler option use ballast bond)
- Spray bottle
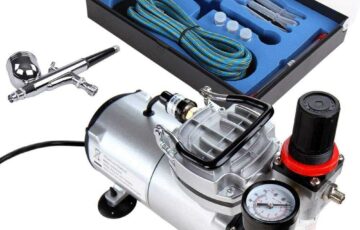
- Airbrush for advanced realism.
Step 2
Ensure all the track to be ballasted is secure, clean, and working properly. Before laying a single stone of ballast test all sections of the track and resolve any problems before starting the ballast work. It is essential that you continuously test the track when laying the ballast to ensure smooth running later once complete.
Woodland Scenics Ballasting Guide
Step 3
Prepare the area to be ballasted. Tape off any fragile sections of track, points etc and any areas away from the track you don’t want to damage. Use some low tack masking tape for this.
Step 4
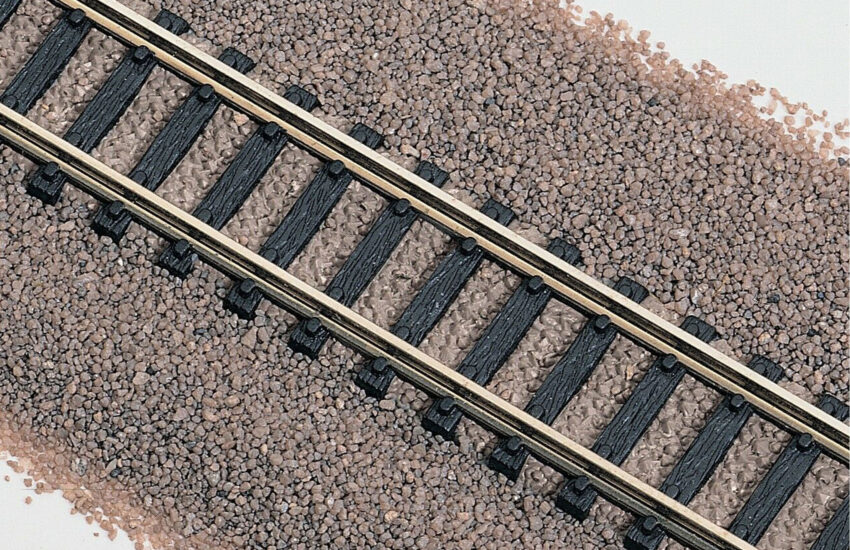
Pour some ballast over the area of track you are working on, then slowly begin to spread it into all the gaps between the sleepers using a paint brush. Ensure a spread of the ballast and that it lays equal to or below the height of the rail sleepers and does not touch the inside edge of the rails. Only cover a few inches at a time to avoid spreading the ballast around the whole layout if you accidentally knock the baseboard.

Step 5
Prepare your PVA glue mixture to hold the ballast in place. Mix 50/50 water and PVA then add a drop of fairy washing liquid to the mix. This drop of washing liquid helps break down the tension allowing the glue mix to flow through the ballast to hold it all in place. We recommend using the ballast bond as a quicker and cleaner alternative but if you are working to a budget the PVA mix method will work well for many other areas of work on your layout.
Step 6
Using the spray bottle for the PVA mix, spray the ballast from about 1ft away, any closer and the spray will send the ballast flying off in different directions. If you choose to use the ballast bond, it comes with an eye dropper tool. Use this to apply the bond evenly over the ballast. Then sit back and wait. Patience is key and a wait of 24 hrs should be enough to ensure the ballast is firmly place.
Step 7
To add further realism to your model railway, you can add a layer of dirty ballast close to and around the tracks. This can be done either by adding a slightly darker shade of ballast close to the tracks, just a thin covering should do. Or using an airbrush, using rust and dark brown shades of paint spray up to the edge of the tracks. Ensure before doing this method you have taped the track.
Step 8
More cleaning! Using a track rubber give the tracks a light scrub and ensure there is no ballast against the inside of the rails.
How to Ballast a Model Railway Track Quickly
There are some fantastic tools out there to speed up ballasting. One of our favourites is the quick ballaster by Golden Valley Hobbies. It is very simple to use and can knock hours off the job at hand. Simply place the quick ballaster on the tracks. Fill it with ballast and then run it over the section of track to be ballasted. As simple as that. The quick ballaster also comes in a variety of scales so every model railway is covered.

How to Ballast Model Railway Points
Ballasting points is the nightmare of any model railroader. As you will see however it is just as simple as ballasting the rest of the track with one slight difference. As you will see in Everard Junctions video to the right, the key is to avoid ballasting the point mechanism, or the part where you would attach a point motor. This stops the ballast from getting inside the mechanism, preventing it from opening and closing fully. Ensure the ballast over the rest of the points track lays flush or below the sleepers and test continuously throughout.