Airbrushing
Welcome to the exciting world of airbrushing! If you're a model railway enthusiast looking to enhance the realism and detail of your layouts, airbrushing is a fantastic tool to add to your arsenal. In this guide, we'll explore the basics of airbrushing specifically tailored for beginners in the model railway hobby.
Understanding Airbrushing
Airbrushing is a versatile painting technique that offers smoother and faster paint application compared to traditional brush methods. It complements regular paintbrushes and can significantly accelerate the painting process by up to 80%. The key to airbrushing lies in its mechanism: paint is added to a cup, and air is pushed through the bottom to atomize the paint into a fine spray, resulting in a smooth and even application.
Essential Equipment
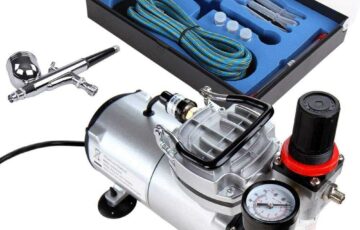
To begin your journey into airbrushing, you'll need three main components: an airbrush, compressor, and hose. Here's a breakdown of each:
Airbrush
When selecting an airbrush, consider a gravity feed dual-action airbrush as it's the most common and recommended for painting miniatures and scale models, including model railways. While there are numerous brands available, it's crucial to invest in a quality airbrush that offers ease of control and cleaning.

For beginners, consider options from reputable brands such as Sparmax, Badger, Iwata, or Harder & Steenbeck. These brands offer a range of airbrushes suitable for various skill levels and budgets. Aim for a mid-range airbrush with a needle size of 0.4, which strikes a balance between versatility and ease of use.
- Compressor
The compressor is the power source for your airbrush and plays a vital role in achieving consistent airflow. Opt for a compressor with pressure control for precise adjustments. Single piston engine compressors with a tank provide a more stable airflow compared to those without a tank. While budget-friendly options are available, investing in a quality compressor ensures smoother operation and longevity.
Recommended compressor brands include Hansa or Iwata for a reliable performance. Look for compressors with a noise level below 52 dB for a quieter working environment.
- Hose
Ensure the hose size matches that of your airbrush and compressor for compatibility. Standard hoses are typically included with airbrushes and compressors, but double-check to avoid any issues during setup.
Getting Started
Once you have your equipment assembled, it's time to dive into the basics of airbrushing. Here's a step-by-step guide:
- Prepare Your Workspace: Set up a well-ventilated area with adequate space for painting. Consider using a cardboard box or makeshift spray booth to contain overspray and minimize mess.
2. Thin Your Paint: Whether using regular acrylics or airbrush-ready paints, thinning is crucial for optimal spraying. Use a flow improver or water to achieve the desired consistency, ensuring smooth flow through the airbrush.
3. Practice Control: Before tackling your model railway, practice control and technique on a spare surface. Familiarize yourself with the airbrush's trigger and airflow adjustments to achieve varying spray patterns.
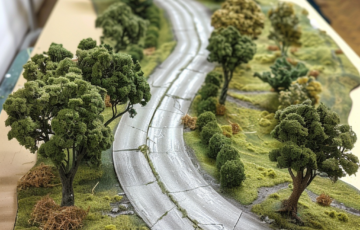
5. Begin Painting: Once comfortable, start applying thin layers of paint to your model railway. Start with lighter colors as a base and gradually build up layers for depth and detail. Experiment with different techniques such as fading, shading, and highlighting to enhance realism.
6. Clean Thoroughly: After each painting session, clean your airbrush thoroughly to prevent clogging and maintain optimal performance. Disassemble the airbrush and clean each component with an appropriate cleaning solution.
Conclusion
Airbrushing is a rewarding skill that adds a new dimension to your model railway hobby. With the right equipment and practice, you can achieve stunning paint effects and bring your layouts to life. Remember to start with the basics, experiment, and enjoy the creative process. Happy airbrushing!