Model Railway Curves
Modelling realistic curves on a model railway can be a tricky task. A model railway curve radius should be proportional to the scale of the layout, larger layouts can have a larger radius and smaller layouts will require a smaller radius. But how small is too small?
The smallest radius that can be used for curves on a model railway depends on the gauge of the track and the size of the trains. Larger carriages and locomotives will naturally require a larger radius but something like a tram can bend round a tight radius. Some general guidelines on the smallest radius possible on model railway curves are:
N Scale – 9 inches
HO Scale – 15 inches
OO scale – 17 inches
These are just general guidelines, and the actual minimum radius may vary depending on the specific track and trains that you are using. It is a good idea to consult the manufacturer's recommendations for the track and trains that you are using to determine the minimum radius that is appropriate for your layout. Also look out for tools that guide you on laying the perfect curve for your scale, making your life much easier!

How can I make my curves look more realistic on a model railway?
- Start by using the correct radius depending on the scale. N scale will require a smaller radius than OO for example.
2. Use flexible track. Flexible track is a type of track that can be bent into different shapes, including curves. It is a good choice for creating realistic curves, as it allows you to easily adjust the shape of the track to match the desired radius.
3. Use track pins or other track fasteners: Track pins or other track fasteners can be used to hold the track in place on the baseboard and ensure that it maintains its shape.

This is especially important when modelling curves, as it can help to prevent the track from spreading out or becoming misaligned.
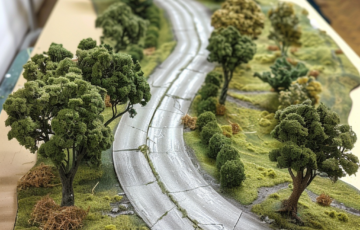
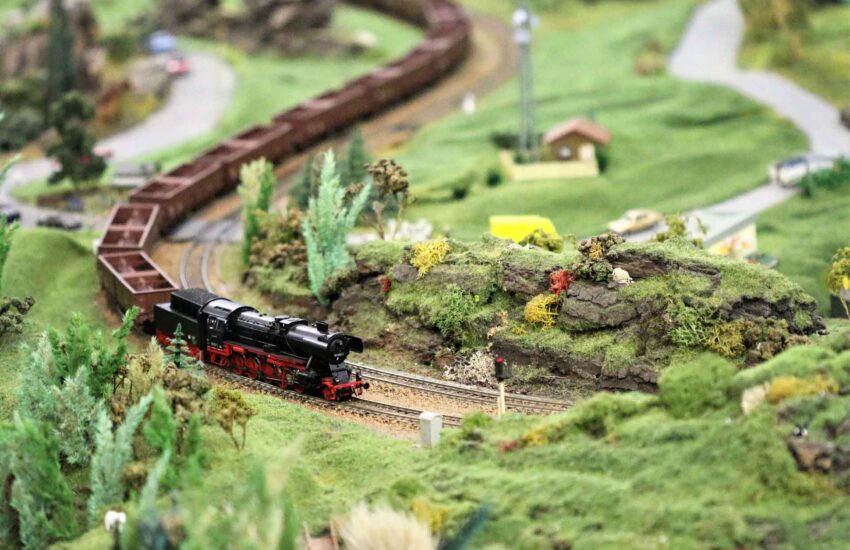
4. Use scenery to conceal the track: Scenery, such as trees, buildings, and other structures, can be used to conceal the track and create the illusion that the train is moving through a realistic environment. This can help to make the curves on your layout look more realistic.
Some Extra Tips to Help to Conceal Model Railway Curves
If you are having trouble creating realistic curves on your model railway due to a lack of space then some of the tips below can help.
- Use scenery to conceal the curves: Scenery, such as trees, buildings, and other structures, can be used to hide the curves on your layout.
- Use tunnels or bridges to cover the curves: Tunnels and bridges can be used to cover the curves on your layout and create the illusion that the track is straight.
- Use a helix or spiral to transition between different levels: If you have a multi-level layout, you can use a helix or spiral to transition between different levels while concealing the curves. A helix is a circular ramp that allows trains to climb or descend between different levels, while a spiral is a series of curved tracks that allow trains to make a gradual transition between different levels.