Flexible model railway track is a type of track that can be bent into different shapes to create curves and other complex layouts. It is made from a flexible material that allows it to be easily shaped.
Flexible model railway track is often used in conjunction with track pins, track glue, or track brackets to hold it in place on the baseboard. It is available in a variety of gauges and track types, including plain track, turnouts, and crossings.
One of the main advantages of flexible model railway track is that it allows for the creation of complex layouts that would be difficult to achieve using traditional rigid track. It is also easy to install and can be cut to fit a variety of different layout configurations.
However, it is important to follow the manufacturer's instructions for using flexible model railway track, as it can be easy to damage the track if it is not handled properly. Make sure to handle the track carefully and avoid applying too much force when bending it.

Cutting Flexible Model Railway Track
You may need to cut the model railway track to the necessary length for the track required. Cutting flexible track can be done with a few tools such as specially designed track cutters. They have a serrated edge that can be used to grip and cut through the rail, minimising any potential damage.

Another tool you can use is a rotary cutting tool such as a Dremel. They be slightly less accurate than track cutters but still produce a clean result. Be sure to wear safety goggles! Lastly the use of a hacksaw, just like in the good old days.
Once you have cut the track be sure to gently file the ends of each piece of track to a smooth finish and be sure to test it prior to installing it in place.
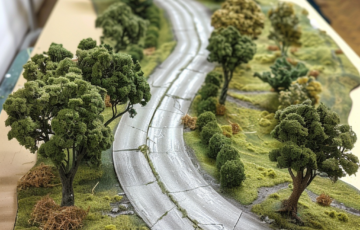
Laying Flexible Model Railway Track
Laying flexible model railway track involves positioning the track on the baseboard and securing it in place. Here is a general outline of the process:
- Begin by laying out the track according to your desired layout. Make sure to follow any manufacturer's instructions for installing the track.
- Position the track on the baseboard and use track pins, track glue, or track brackets to secure it in place.
Track pins are small metal pins that are used to secure the track to the baseboard, track glue is a specialized adhesive that is used to hold the track in place, and track brackets are small metal or plastic brackets that are used to secure the track to the baseboard.
3. Bend the track as needed to create curves or other complex layouts. Make sure to follow the manufacturer's instructions for bending the track, and be careful not to apply too much force, as this can cause the track to become damaged.
4. Test the track to make sure that it is secure and that the trains can run smoothly.